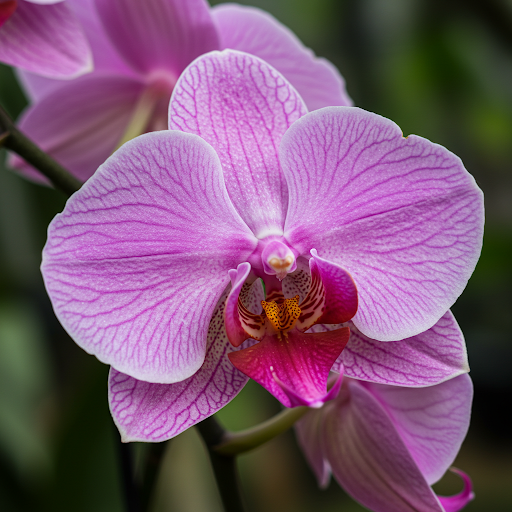
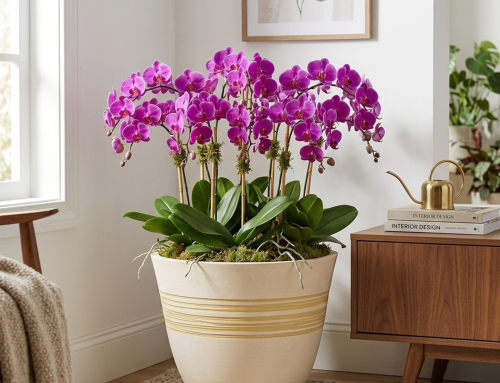
Unbelievable Orchid Multiplication: Double Your Blooms with Easy Orchid Division!
Dreaming of a home overflowing with beautiful orchids? What if you could magically double your orchid collection without buying more plants? Believe it or not, it’s not magic – it’s orchid division! This surprisingly simple propagation technique allows you to take one healthy orchid and gently separate it into two or more independent plants, each capable of blooming and thriving on its own. It’s the secret weapon of orchid enthusiasts for expanding their collection affordably and easily!
This article will reveal the unbelievable ease of orchid division, a method perfect for home gardeners of all levels. We’ll walk you through a step-by-step guide, covering everything from choosing the right orchids and timing to expert tips for successful division and post-care. Get ready to multiply your orchids and enjoy twice the beauty and bloomswith this straightforward technique!
The Magic of Division: Why and When to Divide Your Orchids
Orchid division is not just about getting more plants for free; it’s also a crucial part of orchid care. Understanding the “why” and “when” will set you up for propagation success:
Why Divide? The Benefits of Orchid Division
- Plant Multiplication: The most obvious benefit! Division allows you to increase your orchid collection from your existing plants, saving money and expanding your orchid family.
- Rejuvenation of Mature Plants: Over time, some orchids, especially sympodial types (like Cymbidiums and Cattleyas), can become overcrowded and less floriferous. Division rejuvenates these mature plants, giving them more space to grow and bloom vigorously again.
- Improved Plant Health: Dividing overcrowded orchids improves air circulation and light penetrationaround the plant, reducing the risk of fungal diseases and pests.
- Manage Plant Size: Orchids can grow quite large! Division helps to manage the size of sprawling orchids, making them easier to handle and display in your home.
- Sharing and Gifting: Once you master division, you’ll have extra orchids to share with friends and family, making wonderful and unique gifts.
When to Divide? Timing is Key for Success
- After Blooming: The ideal time to divide most orchids is right after they finish blooming, as they are entering a period of active growth. This gives the divided plants time to establish themselves before their next blooming cycle.
- During Repotting: Division is conveniently done in conjunction with repotting. When your orchid outgrows its pot or its potting medium decomposes (usually every 1-2 years for many orchids), it’s the perfect opportunity to divide at the same time.
- Signs of Overcrowding: If your orchid is overcrowded in its pot, with pseudobulbs (for sympodial orchids) or leaves growing densely over the pot edge, it’s a good indication it’s ready for division.
- Healthy Root System: Only divide healthy, vigorous orchids. Avoid dividing stressed, diseased, or recently repotted orchids. Ensure your orchid has a well-established and healthy root system before attempting division.
- Specific Orchid Types: The best timing can vary slightly depending on the orchid type. For example, Phalaenopsis orchids are often divided by stem cuttings (though division is also possible), while sympodial orchids like Cymbidiums are prime candidates for rhizome division.
Orchid Division Demystified: A Step-by-Step Guide
Dividing orchids might sound intimidating, but with the right tools and gentle approach, it’s a straightforward process. Here’s a general step-by-step guide, adaptable for most sympodial orchids:
Materials You’ll Need:
- Healthy Orchid Plant Ready for Division
- Sharp, Sterilized Cutting Tool (Knife, Pruning Shears, or even strong scissors)
- New Pots (Appropriate size for divided sections)
- Fresh Orchid Potting Mix (Specific to your orchid type – e.g., bark mix for Phalaenopsis, terrestrial mix for Cymbidiums)
- Sterilizing Solution (Rubbing Alcohol or diluted bleach)
- Gloves (Optional, but recommended to protect your hands and prevent contamination)
- Watering Can or Spray Bottle
- Optional: Cinnamon Powder (Natural fungicide and sealant)
Step-by-Step Division Process:
- Prepare Your Tools and Workspace: Sterilize your cutting tool by wiping it thoroughly with rubbing alcohol or dipping it in a diluted bleach solution (1 part bleach to 9 parts water). Ensure you have your new pots and fresh potting mix ready.
- Unpot the Orchid: Gently remove the orchid from its pot. You might need to carefully loosen the roots from the sides of the pot. Handle the roots delicately to minimize damage.
- Clean the Roots (Optional): You can gently rinse the roots under lukewarm water to remove old potting mix and make it easier to see the plant structure and rhizome. This step is optional but helpful.
- Identify Division Points: Examine the orchid plant, focusing on the rhizome (the horizontal stem at the base from which pseudobulbs and roots grow in sympodial orchids). Look for natural division points. Ideally, each division should have at least 2-3 healthy pseudobulbs (or growths) and a good portion of roots.
- Divide the Rhizome: Using your sterilized cutting tool, carefully cut through the rhizome at the identified division points. You may need to use a sawing motion for thicker rhizomes. Be firm but gentle to avoid crushing the plant tissue. Ensure each division has its own roots attached.
- Treat Cuts (Optional): Sprinkle cinnamon powder on the cut surfaces of both the mother plant and the divisions. Cinnamon acts as a natural fungicide and can help seal the cuts, preventing rot.
- Pot Each Division Separately: Pot each division into its own new pot filled with fresh orchid potting mix. Ensure the pseudobulbs (or base of the plant) are at or slightly above the potting mix surface. Do not bury the pseudobulbs too deep, as this can lead to rot.
- Water Lightly: After potting, water the newly divided orchids lightly to settle the potting mix around the roots. Avoid overwatering immediately after division.
- Provide Proper Care: Place the newly divided orchids in a location with appropriate light, temperature, and humidity for their orchid type. Refer to specific care guides for your orchid variety.
Visual Guide (Image Suggestions):
- [Image of: Step 1: Unpotting the orchid from its pot. Hands gently removing orchid from pot, roots visible.]
- [Image of: Step 4: Identifying division points on the orchid rhizome. Close-up showing rhizome and potential cut locations marked or highlighted.]
- [Image of: Step 5: Dividing the rhizome with a sterilized knife. Clear image of cutting through the rhizome to separate divisions.]
- [Image of: Step 7: Potting each division into separate pots with fresh potting mix. Two newly potted orchid divisions side-by-side.]
Post-Division Orchid Care: Nurturing Your New Plants
Proper post-division care is crucial for the successful establishment of your new orchids. Treat them with extra attention in the initial weeks:
- Watering: Water sparingly in the first few weeks after division. Allow the potting mix to slightly dry out between waterings. Overwatering can lead to root rot, especially in newly divided plants.
- Humidity: Newly divided orchids benefit from slightly higher humidity levels. You can increase humidity by placing the pots on humidity trays, grouping plants together, or using a humidifier.
- Light: Provide bright, indirect light, similar to the light requirements of mature orchids of the same type. Avoid direct sunlight, which can scorch tender new growths.
- Fertilizing: Do not fertilize newly divided orchids immediately after division. Wait for at least 4-6 weeks, or until you see signs of new root growth, before starting to fertilize with a diluted orchid fertilizer.
- Temperature: Maintain appropriate temperatures for your specific orchid type. Avoid drastic temperature fluctuations.
- Observe and Adjust: Monitor your newly divided orchids closely for signs of stress or problems like wilting, yellowing leaves, or root rot. Adjust watering, light, or humidity as needed based on your observations.
- Patience is Key: It may take some time for newly divided orchids to fully establish themselves and bloom. Be patient and continue to provide consistent care. They will reward your efforts with beautiful blooms in time!
Expert Tips for Orchid Division Success:
- Sterilize, Sterilize, Sterilize: Always sterilize your cutting tools thoroughly before and between divisions to prevent the spread of diseases.
- Don’t Over-Divide: It’s better to create fewer, healthier divisions than many small, weak ones. Aim for divisions with at least 2-3 healthy pseudobulbs or growths and ample roots.
- Respect the Roots: Handle orchid roots with care during unpotting and division. They are delicate and essential for plant health. Minimize root damage as much as possible.
- Use the Right Potting Mix: Use a fresh, well-draining orchid potting mix specifically formulated for your type of orchid. Using the correct mix is critical for root health.
- Observe Mother Plant Too: Don’t forget to repot the “mother” plant section that remains after division as well, providing it with fresh potting mix and care.
- Label Your Divisions: Label each newly potted division with the orchid name and division date. This helps you track their progress and remember their identity, especially if you are dividing multiple orchids.
- Join an Orchid Society: For more in-depth knowledge and hands-on guidance, consider joining a local orchid society. Experienced orchid growers can offer invaluable advice and support.
Beyond Division: Other Orchid Propagation Methods
While division is a fantastic method for many orchids, it’s not the only way to multiply these beautiful plants. Depending on your orchid type, you might also explore:
- Keiki Propagation (Phalaenopsis): Phalaenopsis orchids often produce “keikis” – baby plantlets that grow on the flower spike or stem. These keikis can be carefully removed and potted once they develop roots. This is a common method for Phalaenopsis multiplication.
- Stem Cuttings (Phalaenopsis, Vanda): Some orchids, like Phalaenopsis and Vanda, can be propagated from stem cuttings. Sections of the stem with nodes can be encouraged to root and grow into new plants under proper conditions.
- Seed Propagation: Orchid seed propagation is a fascinating but more complex method, often used by commercial growers and hybridizers. It requires sterile conditions and specialized techniques, as orchid seeds are tiny and lack endosperm (food reserve).
Conclusion: Double Your Orchid Joy with Division!
Orchid division is a rewarding and accessible propagation method that allows you to multiply your orchid collection, rejuvenate mature plants, and share these stunning blooms with others. With a little patience and care, you can easily transform one orchid into two (or more!), filling your home with even more orchid beauty. So, take the plunge, try orchid division, and experience the unbelievable joy of doubling your orchids! Happy growing!
About the Author — Greenship Garden Team
Greenship Garden is a U.S.-based brand dedicated to modern planter design and home gardening inspiration.
Our editorial team combines years of experience in plant care, garden styling, and sustainable living to help plant lovers create their perfect green spaces.
Through this blog, we share practical gardening tips, planter styling guides, and insights on how to choose the right pots for every home.
🌿 Written and reviewed by the Greenship Garden Team.