Just Put it in Orchid Soil: Watch Orchids Bloom Abundantly & Grow 1001 Roots – The Ultimate Guide!
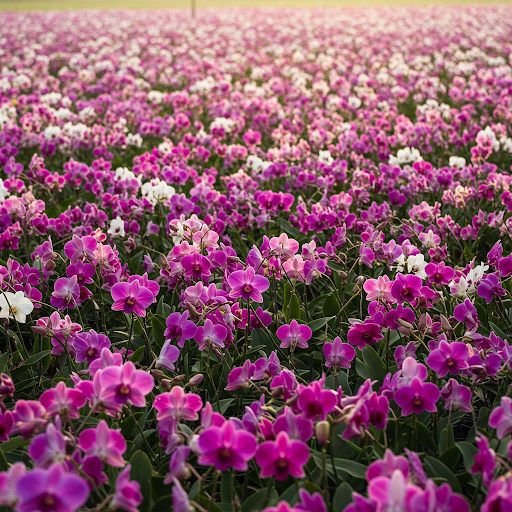
Are you struggling to get your orchids to bloom? Do you dream of vibrant, long-lasting flowers and a cascade of healthy roots spilling from your orchid pots? The secret to unlocking your orchid’s full potential might be simpler than you think: it’s all about the soil! Contrary to popular belief, orchids don’t thrive in regular garden soil. Their unique root systems and specific needs demand a specialized growing medium – orchid soil, also known as orchid potting mix or orchid substrate.
This article will delve into the essential role of orchid soil in achieving abundant blooms and a thriving root system. We’ll explore why regular soil fails orchids, what makes orchid soil so special, how to choose the right mix for your orchid, and expert tips for repotting and care. Get ready to witness your orchids transform and flourish like never before, simply by switching to the right soil!
Why “Soil” is a Misnomer: Understanding Orchid Growing Media
The term “orchid soil” is actually a bit misleading. In their natural habitats, most orchids are epiphytes, meaning they grow on trees, rocks, or other surfaces – not in the ground! They obtain moisture and nutrients from the air, rain, and decaying organic matter around their roots. Therefore, what we call “orchid soil” is not soil at all, but rather a specialized potting mix or substrate designed to mimic their natural growing conditions.
Why Regular Soil is a Death Sentence for Orchids:
Using regular garden soil or even standard potting soil for orchids is a recipe for disaster. Here’s why:
- Poor Drainage: Regular soil is too dense and retains too much water. Orchid roots need excellent drainage and air circulation. Soggy soil suffocates orchid roots, leading to root rot, the number one killer of orchids.
- Lack of Aeration: Dense soil compacts easily, depriving orchid roots of the oxygen they need to breathe and absorb nutrients.
- Incorrect Water Retention: While orchids need moisture, they also need the potting mix to dry out somewhat between waterings. Regular soil stays wet for too long, creating a constantly damp, unhealthy environment for orchid roots.
- Nutrient Imbalance: Regular soil may contain excessive nutrients or the wrong type of nutrients for orchids, potentially leading to fertilizer burn or imbalanced growth.
The Magic of Orchid Soil: Mimicking Nature for Thriving Orchids
Orchid soil, or orchid potting mix, is specifically formulated to address the unique needs of orchids. The ideal orchid mix provides:
- Excellent Drainage: The primary function of orchid soil is to drain water quickly and efficiently, preventing waterlogging and root rot.
- Optimal Aeration: Orchid mixes are chunky and porous, allowing air to circulate freely around the roots, providing essential oxygen.
- Moisture Retention (Balanced): While draining well, a good orchid mix also retains enough moisture to keep the roots hydrated between waterings, mimicking the humidity of their natural environment.
- Support and Anchorage: The mix provides physical support for the orchid plant to anchor its roots and grow upright.
- Nutrient Delivery (Optional): Some orchid mixes may contain slow-release fertilizers or organic matter to provide a gradual release of nutrients, but fertilization is usually best managed separately with orchid-specific fertilizers.
Key Ingredients in Orchid Soil: What Makes it Special?
Orchid potting mixes are composed of various materials, each contributing to the desired drainage, aeration, and moisture retention. Common ingredients include:
- Fir Bark: The most common ingredient, fir bark provides excellent drainage, aeration, and resists decomposition. Different sizes of bark are used for different orchid types.
- Coconut Coir: Coconut husks, chips, or fibers offer good water retention while still providing aeration. They are a sustainable alternative to peat moss.
- Sphagnum Moss: Dried sphagnum moss holds significant amounts of water and provides excellent humidity. It is often used for orchids that prefer more moisture, or as a top dressing.
- Perlite: Small, white volcanic glass particles that improve drainage and aeration in the mix.
- Charcoal: Horticultural charcoal helps improve drainage, aeration, and can absorb excess salts and impurities, keeping the mix fresh.
- Tree Fern Fiber: Fibrous material from tree fern roots, providing excellent drainage, aeration, and longevity.
Choosing the Right Orchid Soil: Matching the Mix to Your Orchid
Not all orchid soils are created equal! The best type of orchid mix depends on the specific type of orchid you are growing:
- For Phalaenopsis (Moth Orchids): Phalaenopsis orchids, the most popular type, thrive in bark-based mixes. Look for mixes with medium-grade fir bark as the primary ingredient, often blended with perlite and charcoal. These mixes provide excellent drainage and aeration, ideal for Phalaenopsis needs.
- For Cattleya and Oncidium Orchids: These orchids also prefer bark-based mixes, similar to Phalaenopsis. You can use the same type of mix or slightly coarser bark if desired.
- For Cymbidium Orchids: Cymbidiums, being more terrestrial orchids, can tolerate slightly more moisture-retentive mixes. Look for mixes containing finer bark, coconut coir, and some sphagnum moss.
- For Paphiopedilum (Slipper Orchids) and Phragmipedium Orchids: These orchids often prefer more moisture and benefit from mixes containing finer bark, sphagnum moss, perlite, and sometimes fine charcoal or pumice.
- For Vanda Orchids: Vanda orchids, often grown in baskets with exposed roots, need very open and airy conditions. They are often grown with coarse bark, charcoal, and sometimes lava rock for maximum aeration and drainage.
Repotting with Orchid Soil: A Step-by-Step Guide to Success
Repotting your orchids into fresh orchid soil is essential for their long-term health and blooming. Here’s how to do it right:
When to Repot:
- Every 1-2 years: Potting mix decomposes over time, losing its aeration and drainage properties. Repotting every 1-2 years is generally recommended.
- When Potting Mix Breaks Down: If the mix looks mushy, compacted, or smells sour, it’s time to repot.
- Roots Overcrowding the Pot: If roots are growing densely around the pot or escaping from drainage holes, it’s a sign your orchid needs a larger pot and fresh mix.
- After Purchasing: Orchids from nurseries are often in less-than-ideal mixes. Repotting into a suitable orchid mix soon after purchase is beneficial.
Materials You’ll Need:
- Your Orchid Plant
- New Orchid Pot (Slightly larger if needed, or same size if just refreshing the mix)
- Fresh Orchid Potting Mix (Appropriate for your orchid type)
- Sterilized Pruning Shears or Scissors
- Sterilizing Solution (Rubbing Alcohol or diluted bleach)
- Gloves (Optional)
- Watering Can
Repotting Steps:
- Prepare Your Tools and Workspace: Sterilize your cutting tools. Have your new pot and fresh orchid mix ready.
- Unpot the Orchid: Gently remove the orchid from its old pot. Carefully loosen roots if they are stuck to the sides.
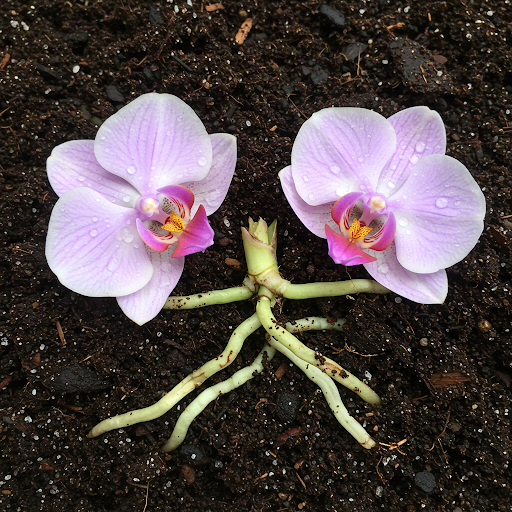
- Inspect and Trim Roots: Examine the roots. Trim away any dead, mushy, brown, or papery roots with your sterilized shears. Healthy roots are firm and plump, often white or silvery green.
- Remove Old Potting Mix: Gently remove as much of the old potting mix from the roots as possible, being careful not to damage healthy roots. Rinsing the roots under lukewarm water can help.
- Choose the Right Pot: Select a new pot that is only slightly larger than the root ball, or the same size if you are just refreshing the mix. Ensure the pot has drainage holes. Orchid pots can be terracotta or plastic; terracotta provides better aeration but dries out faster.
- Pot with Fresh Orchid Mix: Place a layer of fresh orchid mix at the bottom of the pot. Position the orchid in the center and fill the pot with fresh mix, gently working it around the roots. Do not compact the mix too tightly. The base of the plant should be level with or slightly above the mix surface.
- Water Lightly: Water the newly repotted orchid lightly to settle the mix. Avoid overwatering immediately after repotting.
- Provide Post-Repotting Care: Place the repotted orchid in a location with appropriate light and humidity. Avoid fertilizing for the first 4-6 weeks to allow the roots to adjust.
Visual Guide (Image Suggestions):
- [Image of: Step-by-step images of repotting an orchid: 1. Unpotting orchid, 2. Trimming dead roots, 3. Repotting in fresh orchid mix, 4. Newly repotted orchid.]
- [Image of: Close-up comparison of old, decomposed orchid mix vs. fresh, chunky orchid mix.]
- [Image of: Different types of orchid potting mixes side-by-side: Bark mix, Moss mix, Coir mix, labeled appropriately for orchid types.]
Expert Tips for Using Orchid Soil for Maximum Blooms & Roots:
- Fresh is Best: Use fresh orchid potting mix for repotting. Avoid using old, decomposed mix.
- Don’t Overpack: Do not compact the orchid mix too tightly in the pot. It should be loose and airy to allow for good drainage and aeration.
- Watering Technique: Water thoroughly but infrequently. Allow the top inch or so of the potting mix to dry out between waterings. The “soak and drain” method is generally best.
- Fertilize Regularly (Orchid Fertilizer): Use a balanced orchid fertilizer diluted to half or quarter strength, especially during the growing season.
- Observe Your Orchid: Pay attention to your orchid’s leaves and roots. Leaf color, root appearance, and overall plant vigor will tell you if you are using the right mix and watering correctly.
- Repot Regularly: Don’t wait too long to repot. Regular repotting with fresh orchid mix is a key element of long-term orchid health and blooming.
- Consider Top Dressing with Moss (Optional): In dry climates or for orchids that prefer higher humidity, you can top-dress the orchid mix with a thin layer of sphagnum moss to help retain surface moisture.
Troubleshooting: Common Orchid Soil & Root Issues
- Yellowing Leaves, Mushy Roots: Overwatering and poorly draining potting mix are the most common causes. Repot immediately into fresh orchid mix, trim away root rot, and adjust watering habits.
- Dry, Shriveled Roots: Underwatering or overly dry potting mix. Increase watering frequency or soak the pot more thoroughly.
- Slow Growth, Few Blooms: Could be due to insufficient light, improper fertilization, or old, depleted potting mix. Assess light levels, fertilize appropriately, and repot if needed.
- White Mold on Potting Mix Surface: Often harmless saprophytic fungi thriving in moist organic matter. Improve air circulation and allow the surface to dry out slightly more between waterings. If excessive, repotting with fresh mix may be needed.
Conclusion: The Foundation of Orchid Success is in the Soil!
Providing your orchids with the correct orchid soil is not just a minor detail – it’s the foundation for their thriving health, abundant blooms, and magnificent root systems. By understanding the unique needs of orchids and choosing the right potting mix, you are giving them the best possible start and setting the stage for years of orchid enjoyment. So, ditch the regular soil, embrace orchid soil, and unlock the true potential of your orchids!
About the Author — Greenship Garden Team
Greenship Garden is a U.S.-based brand dedicated to modern planter design and home gardening inspiration.
Our editorial team combines years of experience in plant care, garden styling, and sustainable living to help plant lovers create their perfect green spaces.
Through this blog, we share practical gardening tips, planter styling guides, and insights on how to choose the right pots for every home.
🌿 Written and reviewed by the Greenship Garden Team.
