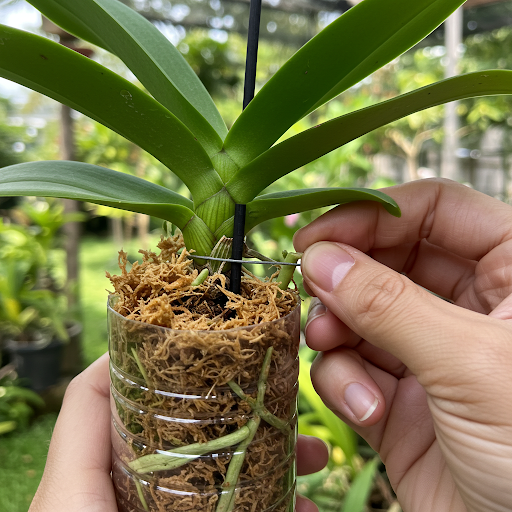
Give Your Orchid a Root Boost: The Plastic Bottle Humidity Trick
Struggling to get your orchid to grow new roots? Whether you’re dealing with a rescued orchid with a sparse root system or trying to root a keiki (a baby orchid), creating a humid microclimate can significantly encourage root development. One clever and budget-friendly method, highlighted in the Spanish article, involves using a recycled plastic bottle. Here’s how this “humidity dome” technique can help your orchid take root.
Why Orchids Need Roots (and Why They Sometimes Struggle)
Healthy roots are essential for an orchid’s survival. They anchor the plant, absorb water and nutrients, and play a vital role in overall health. Orchids can struggle to grow new roots due to various factors, including:
- Overwatering: This is a common culprit, leading to root rot and the loss of healthy roots.
- Underwatering: While less common, severe dehydration can also damage roots.
- Physical Damage: Roots can be damaged during repotting or by pests and diseases.
- Stress: Environmental changes or improper care can stress an orchid, hindering root growth.
- Keikis: These baby orchids, while capable of independent growth, often start with a small or underdeveloped root system.
The Plastic Bottle Method: Creating a Root-Boosting Microclimate
The plastic bottle method works by creating a humid environment around the base of the orchid, which encourages the development of new roots. The increased humidity reduces water loss from the plant and stimulates root initiation.
Materials You’ll Need:
- A Recycled Plastic Bottle: Choose a clear plastic bottle that’s large enough to comfortably enclose the base of your orchid without the leaves touching the sides. A soda or water bottle with the top cut off works well.
- Your Orchid: This method is particularly useful for orchids with few or damaged roots, or for rooting keikis.
- Sphagnum Moss (Optional but Recommended): Slightly damp sphagnum moss can provide additional moisture and support root growth.
- Water: For misting or slightly dampening the sphagnum moss.
- Scissors or a Craft Knife: To cut the plastic bottle.

Step-by-Step Guide to Rooting Your Orchid with a Plastic Bottle:
- Prepare the Bottle: Carefully cut off the top portion of the plastic bottle, leaving enough height to cover the base of your orchid. You can either remove the cap or leave it slightly ajar for minimal air circulation. Ensure the cut edges are smooth to avoid damaging the orchid.
- Prepare the Orchid: Gently remove any dead or damaged leaves or root remnants from the base of the orchid.
- Add Sphagnum Moss (Optional): If using sphagnum moss, lightly dampen a small amount and place it at the bottom of the plastic bottle. This will help maintain humidity.
- Position the Orchid: Carefully place the base of the orchid inside the plastic bottle, ensuring that the leaves are outside the bottle. If using sphagnum moss, the base of the orchid can rest on top of it. The goal is to enclose the root area (or where you want roots to grow) in the humid environment.
- Add a Little Moisture (If Needed): If you’re not using sphagnum moss, you can lightly mist the inside of the bottle with water to create some initial humidity. Avoid getting the orchid’s leaves wet. If using damp sphagnum moss, additional water may not be necessary.
- Create Airflow (Important): While the goal is humidity, stagnant air can lead to rot. You can achieve airflow by:
- Leaving the bottle cap slightly ajar.
- Poking a few small holes in the sides or top of the bottle.
- Lifting the bottle off the surface for a short period each day.
- Place in Indirect Light: Position the bottle with the orchid in a location that receives bright, indirect light. Avoid direct sunlight, which can overheat the enclosed environment.
- Monitor and Maintain: Regularly check the humidity levels inside the bottle. You should see some condensation forming. If it’s excessively wet, increase airflow. Ensure the sphagnum moss (if used) remains lightly damp but not waterlogged.
- Be Patient: Root growth can take time. You may start to see new root tips emerging within a few weeks, but it could take longer depending on the orchid’s condition and the environment.
- Gradually Acclimate: Once the new roots are a few inches long, you can gradually acclimate the orchid to the regular environment by removing the bottle for increasing periods each day before eventually repotting it into its regular pot with appropriate orchid potting mix.
Tips for Success:
- Cleanliness is Key: Ensure your bottle and any tools you use are clean to prevent the introduction of bacteria or fungi.
- Don’t Overdo the Moisture: Too much moisture inside the bottle can lead to rot. The goal is high humidity, not constant wetness.
- Observe for Mold or Fungus: If you notice any mold or fungal growth inside the bottle, remove the orchid, clean the bottle, and adjust the moisture and airflow.
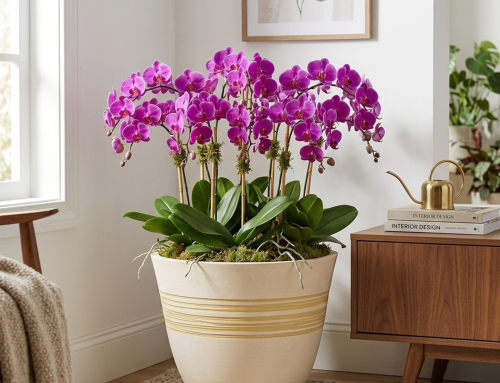
- Consider the Orchid Type: While this method can work for various orchids, it’s particularly effective for Phalaenopsis and other orchids that produce aerial roots or keikis.
Alternative Methods for Encouraging Root Growth:
While the plastic bottle method is a great option, other techniques can also help:
- Sphagnum Moss in a Pot: Simply placing the base of the orchid in a pot filled with slightly damp sphagnum moss can also create a humid environment.
- Rooting Hormones: While not a “natural” method, some orchid growers use rooting hormones to stimulate root development.
- Humidity Trays: Placing your orchid pot on a humidity tray can provide a consistent level of humidity.
Conclusion:
The recycled plastic bottle method is a simple yet effective way to create a humid microclimate that can encourage root growth in struggling orchids. By following these steps and providing the right conditions, you can give your orchid a much-needed boost and increase its chances of thriving. Remember to be patient and observe your plant closely as it embarks on its journey to recovery.
About the Author — Greenship Garden Team
Greenship Garden is a U.S.-based brand dedicated to modern planter design and home gardening inspiration.
Our editorial team combines years of experience in plant care, garden styling, and sustainable living to help plant lovers create their perfect green spaces.
Through this blog, we share practical gardening tips, planter styling guides, and insights on how to choose the right pots for every home.
🌿 Written and reviewed by the Greenship Garden Team.