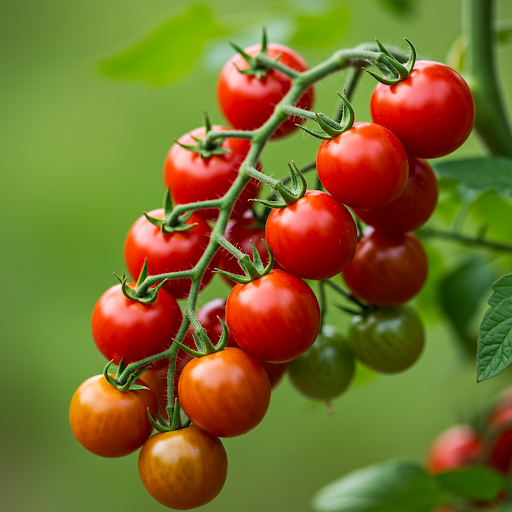
The Smart Start: How to Sow Tomatoes for Strong Seedlings Without the Fuss of Pricking Out
Want to grow a bumper crop of tomatoes this year? It all starts with strong, healthy seedlings. The Spanish article highlights a clever approach to sowing tomato seeds that minimizes root disturbance and eliminates the need for early transplanting, often called “pricking out” or thinning. This method focuses on providing each seedling with the space it needs from the get-go, leading to robust growth and a smoother transition to your garden. Let’s explore the best way to sow tomatoes for strong, no-fuss seedlings.

Why Skip the Pricking Out?
While pricking out seedlings is a common practice, it can sometimes cause stress to the delicate roots of young tomato plants. By sowing seeds strategically, you can avoid this potential setback and encourage stronger, healthier seedlings right from the start. This method aims to give each seedling enough initial space to develop without competition.
The Best Way to Sow Tomatoes for Strong Seedlings (No Pricking Required):
Choose Your Seed Starting Method: You have a couple of excellent options:
- Seed Starting Trays with Individual Cells: These trays have separate compartments for each seed, providing ample space for individual seedling growth and eliminating the need for thinning or pricking out. This is often considered the easiest method.
- Larger Seed Starting Trays or Containers (Sowing Thinly): If you prefer using larger trays or containers, the key is to sow your tomato seeds very thinly, ensuring enough space between them so that the seedlings don’t overcrowd each other too quickly.
Use a Quality Seed Starting Mix: This lightweight, sterile mix is specifically formulated to provide the ideal environment for seed germination and early seedling growth. Avoid using garden soil, which can be too heavy and may contain diseases or pests.
Sow Seeds at the Right Depth: Follow the instructions on your seed packet, but generally, tomato seeds should be sown about ¼ inch deep.
Sow 1-2 Seeds Per Cell (or with Adequate Spacing):
- Individual Cells: Place one or two seeds in the center of each cell. If both germinate, you can snip off the weaker seedling at soil level with clean scissors.
- Larger Trays/Containers: Sow seeds thinly, aiming for at least ½ to 1 inch of space between each seed.
Provide Optimal Conditions for Germination:
- Warmth: Tomato seeds germinate best in warm temperatures (around 70-80°F or 21-27°C). Use a heat mat underneath your seed starting tray to maintain consistent warmth.
- Moisture: Keep the seed starting mix consistently moist but not waterlogged. You can use a spray bottle to gently mist the surface or water from the bottom of the tray.
- Humidity: Cover your seed starting tray with a clear plastic dome or plastic wrap to create a humid environment, which aids germination. Remove the cover once seedlings emerge.
Give Them Plenty of Light: As soon as seedlings emerge, they need bright light to prevent them from becoming leggy (tall and weak). Place your seedlings under grow lights or in a very sunny south-facing window. If using a window, rotate the tray regularly so all seedlings receive even light.
Water Carefully: Once seedlings have developed true leaves, water them gently from the bottom of the tray or with a watering can with a gentle rose. Avoid getting the leaves wet, which can encourage fungal diseases.
Provide Gentle Air Circulation: Once seedlings are established, provide gentle air circulation with a small fan to help strengthen their stems and prevent damping-off disease.
Harden Off Your Seedlings: Before transplanting your tomato seedlings into the garden, you’ll need to gradually acclimate them to outdoor conditions. This process, called hardening off, typically takes about a week. Start by placing the seedlings in a sheltered spot outdoors for a few hours each day, gradually increasing the time they spend outside and their exposure to direct sunlight and wind.
Transplant Carefully: Once your seedlings are hardened off and the danger of frost has passed, transplant them into your garden, spacing them according to the recommendations for your chosen variety.
Benefits of This Method:
- Minimizes Root Disturbance: Avoids the stress of pricking out and transplanting young seedlings.
- Stronger, Healthier Seedlings: Allows for uninterrupted root development.
- Saves Time and Effort: Eliminates the extra step of pricking out.
- Higher Success Rate: Less stress on seedlings can lead to a higher survival rate after transplanting to the garden.
Conclusion:
Starting your tomato seeds the right way is crucial for a successful gardening season. By following these simple steps and focusing on providing adequate space from the beginning, you can raise strong, healthy tomato seedlings without the need for pricking out, setting you up for a bountiful harvest.
About the Author — Greenship Garden Team
Greenship Garden is a U.S.-based brand dedicated to modern planter design and home gardening inspiration.
Our editorial team combines years of experience in plant care, garden styling, and sustainable living to help plant lovers create their perfect green spaces.
Through this blog, we share practical gardening tips, planter styling guides, and insights on how to choose the right pots for every home.
🌿 Written and reviewed by the Greenship Garden Team.