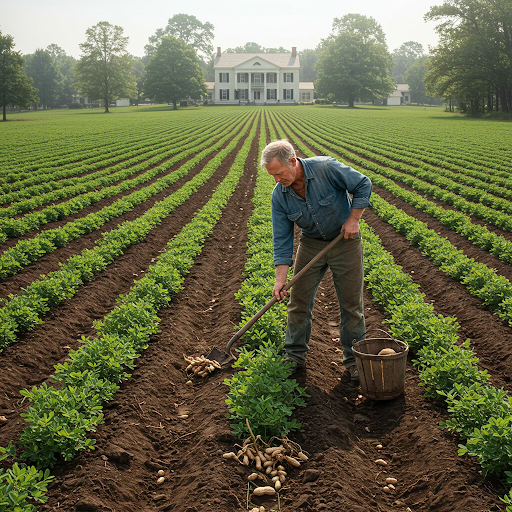
Grow a Mountain of Peanuts: The Simple Trick for a Huge, Delicious Harvest!
Peanuts are a fantastic crop you can easily grow right in your own backyard. Unlike traditional nuts, peanuts grow underground, forming delicious and nutritious tubers (or pods). With the right techniques, you can achieve a bountiful harvest, ensuring you have plenty of large, flavorful peanuts perfect for snacking, cooking, or making your own peanut butter. Whether you have a garden, a small backyard, or even containers, this guide will show you how to grow a successful peanut crop with simple yet effective methods.
Why Grow Peanuts at Home?
Peanuts are a great crop for home gardeners because they are:
- Nutrient-Rich: Packed with protein, healthy fats, and essential vitamins.
- Improve Soil Quality: As legumes, they fix nitrogen in the soil, making it more fertile for other plants.
- Require Minimal Care: With proper soil and water management, peanuts need little maintenance once established.
- Versatile: You can roast, boil, grind them into peanut butter, or use them in various dishes.
Step 1: Choose the Right Peanut Variety
Different peanut varieties are suited to various climates and growing conditions. The four main types include:
- Runner Peanuts: Commonly used for peanut butter; require a longer growing season.
- Virginia Peanuts: Large and great for roasting.
- Spanish Peanuts: Smaller and sweeter, excellent for snacking.
- Valencia Peanuts: Popular for boiling and have a robust flavor.
For home gardens, Valencia and Virginia peanuts are often excellent choices due to their high yields and adaptability.
Step 2: Prepare the Soil for Peanut Success
Peanuts thrive in well-draining, loose, and sandy soil with a slightly acidic to neutral pH (5.8-7.0). Here’s how to prepare the ideal growing environment:
- Select a Sunny Location: Peanuts need 6-8 hours of direct sunlight daily.
- Loosen the Soil: Till or loosen the soil to a depth of 12 inches using a garden fork or tiller.
- Improve Drainage: If your soil is heavy clay, mix in sand, compost, or well-rotted manure.
- Avoid High-Nitrogen Fertilizer: Peanuts fix their own nitrogen, so too much nitrogen-rich fertilizer can hinder tuber development.
Pro Tip: Adding gypsum (calcium sulfate) or wood ash can boost calcium levels, which is crucial for developing strong peanut pods.
Step 3: Plant Your Peanuts the Right Way
Peanuts grow from raw, unsalted peanuts that are still in their shells. If you’re buying raw peanuts from the store, make sure they are fresh and untreated.
Planting Process:
- Shell the Peanuts: Carefully remove the peanuts from their shells, being careful not to damage the seeds.
- Soak the Seeds: Soak the peanut seeds in water overnight to speed up germination.
- Plant at the Right Time: Peanuts grow best in warm temperatures (70-80°F). Plant them in late spring after the last frost.
- Space Seeds Properly: Plant seeds 1-2 inches deep and 6-8 inches apart, with rows spaced 24 inches apart.
- Cover with Soil: Gently cover the seeds with soil and water lightly.
Pro Tip: If growing in containers, choose a deep pot (at least 12-16 inches) to allow room for tuber development.
Step 4: Provide the Right Kind of Care
- Watering:
- Keep the soil consistently moist but not waterlogged. Peanuts need consistent moisture, especially during flowering and pod formation.
- Reduce watering near harvest time to prevent rot and improve flavor.
- Sunlight:
- Ensure at least 6-8 hours of direct sunlight daily for maximum yield.
- Mulching:
- Apply a layer of straw or dried leaves to help retain moisture, suppress weeds, and keep the soil temperature consistent.
- Fertilizing:
- Use organic fertilizers like compost, bone meal, or fish emulsion sparingly for steady growth.
- Avoid high-nitrogen fertilizers, as they encourage leafy growth over tuber development.
- Weed Control:
- Keep the peanut bed free of weeds, especially during the early growth stages.
- Avoid deep cultivation, as peanut plants form underground tubers.
Step 5: The Trick to Encouraging a Maximum Yield
- Hilling the Soil: Once your peanut plants begin to flower, hill the soil around the base of the plants. This helps the pegs (where the peanuts form) enter the soil more easily and encourages more pod development underground.
- Repeat Hilling: Repeat this hilling process 2-3 times throughout the growing season as the plants grow.
- Support Flowering and Pegging: Peanuts produce yellow flowers that send down “pegs” into the soil to form the tubers. Ensure the soil remains loose and permeable so the pegs can penetrate easily.
Step 6: Harvesting Your Peanuts
Peanuts typically take 90-120 days to mature, depending on the variety. Signs that your peanuts are ready to harvest include:
- The leaves turning yellow and starting to dry out.
- The pods developing a rough texture.
- Testing a few pods by digging them up; if the inner shell (seed coat) is fully colored, they are ready.
How to Harvest Peanuts:
- Loosen the soil around the plants with a garden fork before pulling them up.
- Shake off excess soil and allow the entire plant to dry for a few days.
- Cure the Peanuts: Hang the plants in a dry, well-ventilated area for 2-3 weeks to enhance flavor and shelf life.
Pro Tip: For boiled peanuts, harvest when the shells are still soft and moist.
Step 7: Storing and Enjoying Your Peanuts
Once cured, store your peanuts in a cool, dry place. You can:
- Roast them for a crunchy snack.
- Boil them for a delicious Southern treat.
- Grind them into homemade peanut butter.
- Use them in cooking for salads, sauces, and desserts.

Conclusion
Growing peanuts at home is a rewarding and enjoyable experience. With proper soil preparation, planting techniques, and care, you can harvest a bountiful crop of large and flavorful peanuts right from your garden or containers. Whether you roast them, boil them, or turn them into peanut butter, homegrown peanuts taste far superior to store-bought ones. Start your peanut-growing journey today and enjoy the delicious bounty of these underground treasures!
About the Author — Greenship Garden Team
Greenship Garden is a U.S.-based brand dedicated to modern planter design and home gardening inspiration.
Our editorial team combines years of experience in plant care, garden styling, and sustainable living to help plant lovers create their perfect green spaces.
Through this blog, we share practical gardening tips, planter styling guides, and insights on how to choose the right pots for every home.
🌿 Written and reviewed by the Greenship Garden Team.