Unlock Giant, Juicy Radishes: The Soil Prep and Yeast Fertilizer Secret You Need to Know (Plus Potting Guide!)
Radishes are a rewarding and incredibly fast-growing crop, perfect for gardeners eager to see quick results. Often ready to harvest in just 20-30 days from sowing, they’re one of the speediest vegetables you can grow in your garden. However, a successful radish harvest, especially when aiming for size and juiciness, relies on careful attention to planting time, soil preparation, and the right nutrients. In this article, we’ll guide you through the best practices for growing radishes, including how to use a simple yet effective homemade fertilizer made from dry yeast, and we’ll even cover growing them successfully in pots!
The Best Time to Plant Radishes for Success
Radishes thrive when sown in cooler temperatures, making early spring the prime time to get them in the ground in most parts of the US. They don’t tolerate intense heat well, which can cause them to bolt (go to seed prematurely) or become overly spicy. Depending on your region, planting from late February through early spring is often ideal. For a continuous harvest, consider succession planting – sowing small batches of seeds every 2-3 weeks. You can also plant radishes again in late summer or early fall for a second crop.
Choosing the right planting location is crucial for healthy, robust radishes. Radishes prefer a spot that receives full sun, although they can also grow in partial shade, especially during the hotter parts of the year. Aim for a location that gets at least 4-6 hours of direct sunlight daily to help your radishes grow quickly and evenly. More sunlight generally means faster growth and better yields.
Radish Soil Preparation: The Foundation for Big Roots
Properly preparing the soil before planting your radish seeds is essential for encouraging the development of large, juicy roots. Radishes grow best in loose, well-draining soil that allows the roots to expand without resistance. Start by clearing the planting area of any weeds or plant debris, as these can compete with your radishes for nutrients and moisture. Loosening the soil to a depth of about 6-8 inches will also promote the growth of plump, tender roots.
You can further enrich the soil and improve its fertility by adding organic matter such as compost or well-rotted manure. A soil pH of around 6.0 to 7.0 is ideal for radishes. If your soil is too acidic or alkaline, consider amending it with lime or sulfur, respectively, to achieve the correct pH balance. You can purchase a simple soil pH test kit at most garden centers.
Boosting Radish Growth with the Yeast Fertilizer Secret
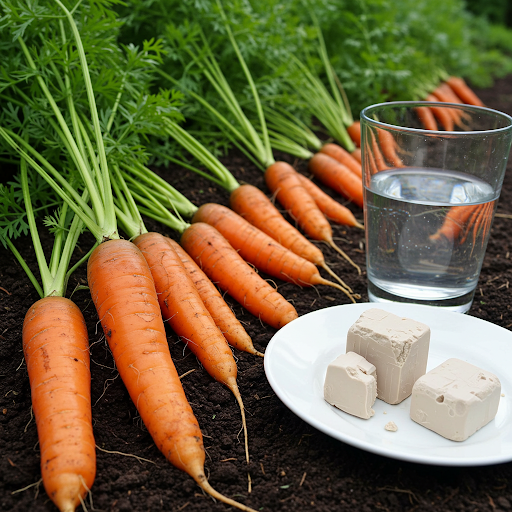
One intriguing method to promote radish growth and development is by adding a natural fertilizer made from dry yeast. Yeast contains beneficial nutrients like vitamins, amino acids, and minerals that can stimulate plant growth and root formation. It may also help improve the plant’s resistance to adverse weather conditions, such as drought or extreme temperatures.
How Yeast Benefits Plants:
- Stimulates Root Growth: Yeast is believed to promote faster and stronger root development, allowing radishes to absorb more nutrients and water from the soil.
- Nutrient Enrichment: Yeast provides essential vitamins, minerals, and amino acids that support the overall health of the plant.
- Enhances Plant Resilience: Plants treated with yeast fertilizer may have a greater ability to withstand extreme weather conditions and pests, making them stronger and less likely to suffer from stress.
How to Make Yeast Fertilizer for Your Radishes:
To make yeast fertilizer for your radishes, you’ll need a few simple ingredients: dry yeast, sugar (optional), and lukewarm water. Follow these steps for the best results:
Ingredients:
- 1 gram of dry yeast (approximately ¼ teaspoon)
- 1 liter of lukewarm water (about 4 cups)
- 1 teaspoon of sugar (optional)
Instructions:
- Begin by dissolving 1 gram of dry yeast in 1 liter of lukewarm water. Ensure the water is not too hot, as this can kill the yeast. The warmth helps activate the yeast and allows it to begin fermentation.
- If you want to further stimulate the fermentation process and provide an additional energy source for the yeast, add 1 teaspoon of sugar to the mixture. The sugar will feed the yeast and speed up the fermentation.
- Let the mixture sit for a few hours. This will give the yeast time to ferment and release beneficial compounds into the water. The longer the yeast ferments, the more nutrients may become available for your plants.
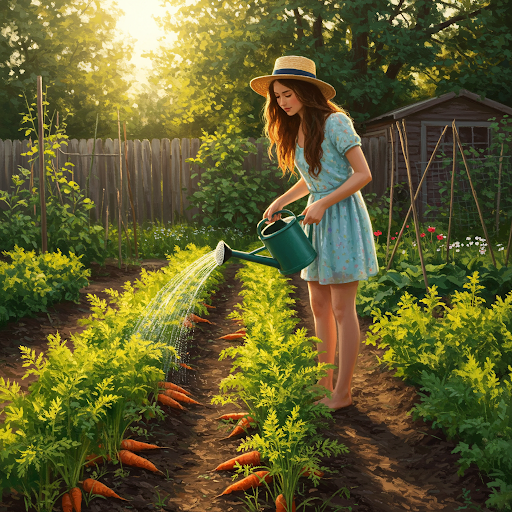
- Once the mixture has fermented, dilute it with additional water if necessary (you can typically use the full liter for a small radish patch or several pots) and use it to water the soil around your radish plants. Ensure the soil is thoroughly moistened, but avoid waterlogging.
Apply the yeast solution to your radishes about 10 days after sowing the seeds or transplanting seedlings. This will give the seeds time to establish themselves, and the yeast will then help stimulate root growth and improve the overall health of the plants. You can also use this mixture on other plants, including tomatoes, cucumbers, and lettuce, to promote vigorous growth and enhance resilience.
Growing Radishes in Pots: A Great Option for Small Spaces
Radishes are excellent candidates for container gardening! Here’s how to grow them successfully in pots:
- Choose the Right Pot: Select a pot that is at least 6 inches deep. Radishes need room for their roots to grow downwards. Wider pots are also beneficial to accommodate multiple plants.
- Use a Good Quality Potting Mix: Avoid using garden soil in containers, as it can compact and hinder drainage. Opt for a well-draining potting mix. You can amend it with compost for added nutrients.
- Planting: Sow seeds directly into the pot, about ½ inch deep and 1-2 inches apart. Thin seedlings as needed to ensure adequate spacing.
- Watering: Container plants tend to dry out faster than those in the ground, so water your potted radishes regularly, keeping the soil consistently moist but not soggy. Ensure the pot has drainage holes.
- Sunlight: Place your potted radishes in a location that receives at least 4-6 hours of direct sunlight per day.
- Fertilizing: You can still use the yeast fertilizer method for potted radishes. Apply the diluted solution every couple of weeks. You can also use a balanced liquid fertilizer diluted to half strength every 2-3 weeks.
Additional Tips for Growing Bigger, Juicier Radishes
While yeast fertilizer can be a great tool for boosting radish growth, there are several other things to keep in mind when growing these quick-maturing vegetables:
- Watering: Radishes need consistent moisture to grow properly, but they don’t like to sit in waterlogged soil. Water your radishes regularly, but ensure the soil drains well to prevent rot. Aim for about an inch of water per week, either through rainfall or manual watering.
- Thinning: Once your radish seedlings have sprouted and are a few inches tall, thin them out to give each plant enough space to grow. Overcrowding can stunt their development, resulting in smaller and less flavorful radishes. Aim for about 1-2 inches between plants.
- Mulching: Applying a layer of mulch around your radish plants can help retain moisture in the soil, suppress weeds, and keep the soil temperature consistent. Organic mulches like straw or shredded leaves work well.
Conclusion
Growing large and juicy radishes is easy when you provide them with the right care and nutrients. Start by planting in early spring when temperatures are cooler, choose a sunny or partially shady location with well-draining soil, and consider using a simple homemade yeast fertilizer to promote root development, enhance plant resilience, and encourage healthy growth. Whether you’re planting in the ground or in containers, these tips will help your radishes thrive, and you’ll be enjoying a crisp and flavorful harvest in just a few short weeks. Whether you’re a novice gardener or a seasoned pro, these techniques will help you grow the best radishes possible.
About the Author — Greenship Garden Team
Greenship Garden is a U.S.-based brand dedicated to modern planter design and home gardening inspiration.
Our editorial team combines years of experience in plant care, garden styling, and sustainable living to help plant lovers create their perfect green spaces.
Through this blog, we share practical gardening tips, planter styling guides, and insights on how to choose the right pots for every home.
🌿 Written and reviewed by the Greenship Garden Team.